In the TM One platform under the Marketing tab, select the "custom pixel" option. Make sure you have selected the correct organization, page types, end date and correct channel. When implementing the custom pixel tracking refer to the instructions below.

Instructions how to implement Choozle Dynamic Pixel in TM:
1. Select custom pixel
2. In the "Starting URL" field, insert the URL string from the SRC URL in the pixel provided. E.g of a dynamic pixel provided by Choozle; <img height="1" width="1" style="border-style:none;" alt="" src="https://insight.adsrvr.org/track/pxl/?adv=ca6uqo3&ct=0:o9yi8fr&fmt=3"/>
Copy URL string in bold and paste in "Starting URL" field within TM.

3. Once the SRC URL is in the "Starting URL" field, select the applicable custom parameters. Set the following parameters in TM1 to passback default values.
- v = face value
- vf = currency
- orderid = order confirmation code
It should look like this!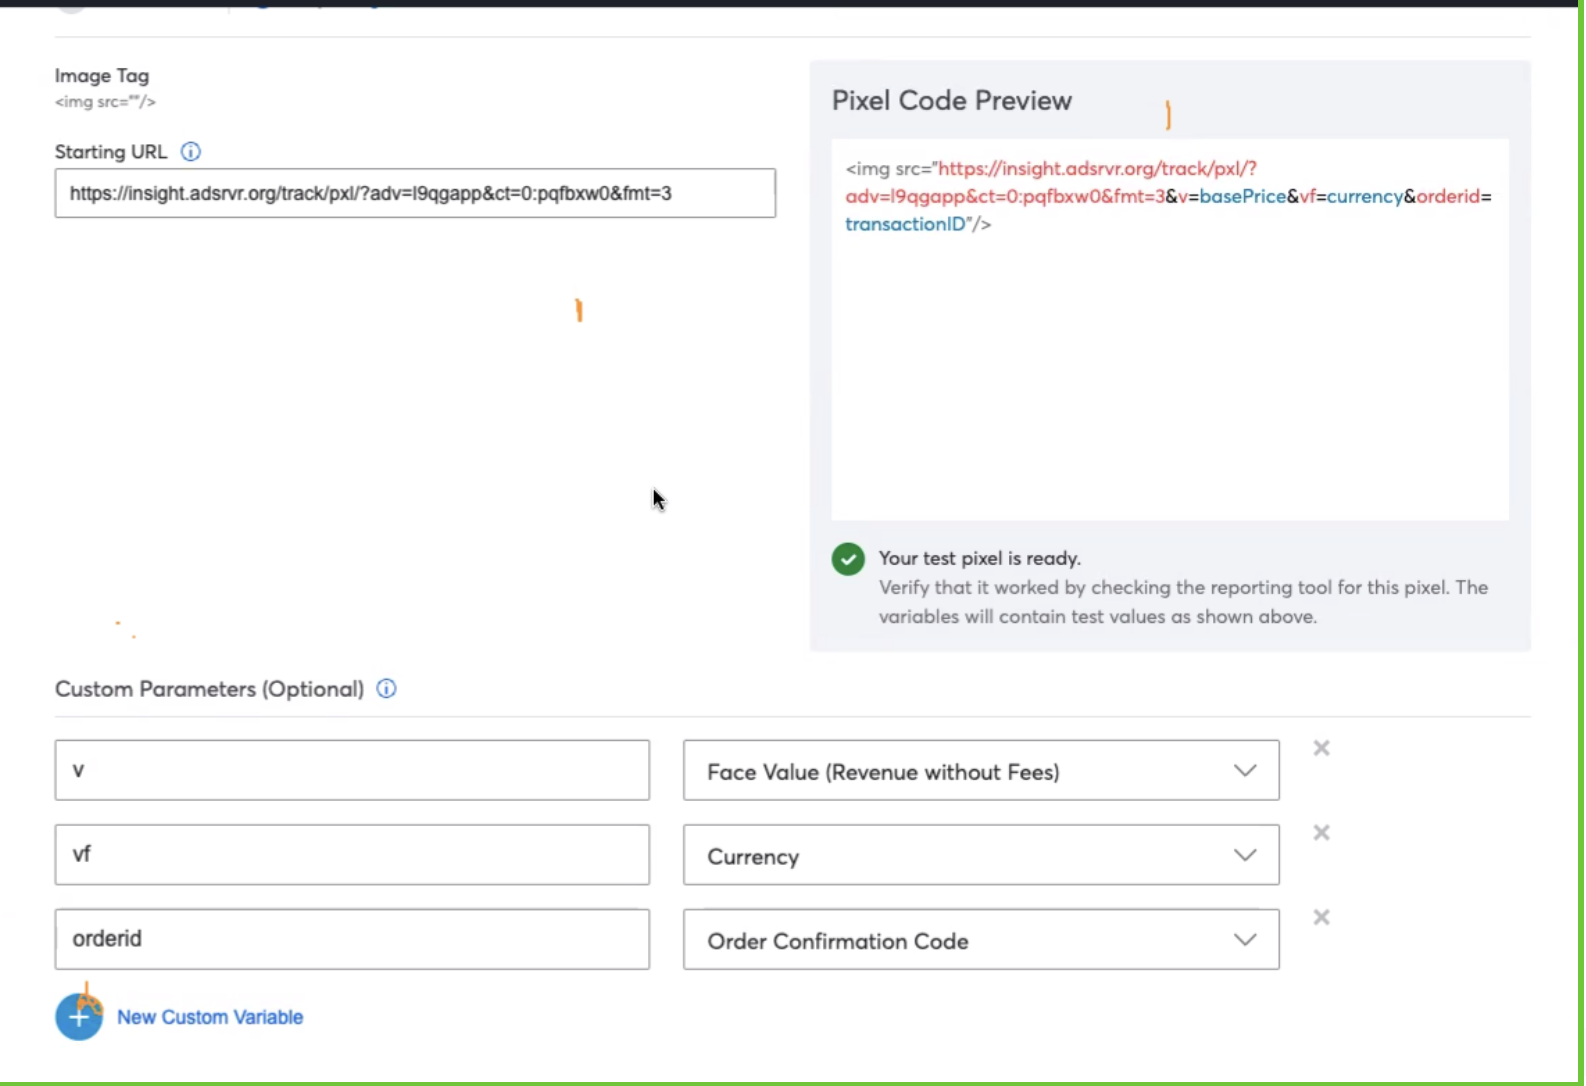
4. Save and publish! You're all done.
Give the dynamic pixel 24 hours to process in TM before we start seeing your website data load into Choozle.
Need Help?
If you have any additional questions please reach via your Customer Support Portal!