Instructions
- Reach out to your Choozle Account Team (or the Support Center) and request a dynamic pixel be created
- Once the Choozle team supplies a dynamic pixel with placeholder parameters. Go to your Google Tag Manager account and select the TAGS tab on the left hand side panel
- Hit 'NEW' and title your TAG, e.g. My Account Name-Choozle Dynamic Pixel
- Click Tag Configuration and select the Custom HTML option under the 'Custom section'
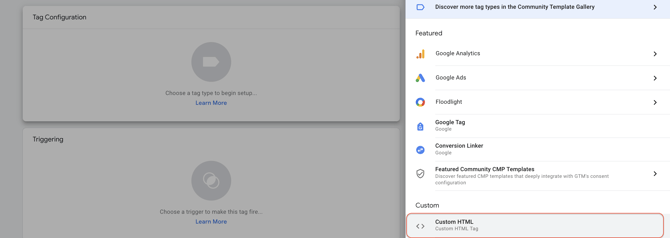
- Copy the Choozle Dynamic Tracking Pixel code snippet and paste into the HTML field
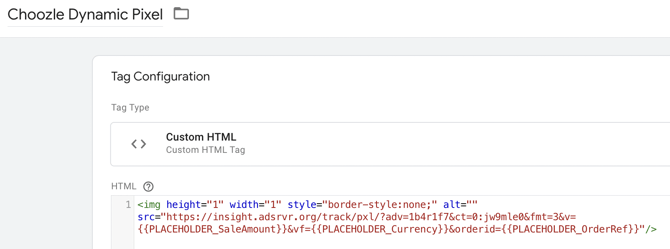
6. Next, in GTM, you will want to replace the standard variables in the pixel tag with double curly brackets around each variable as seen above.
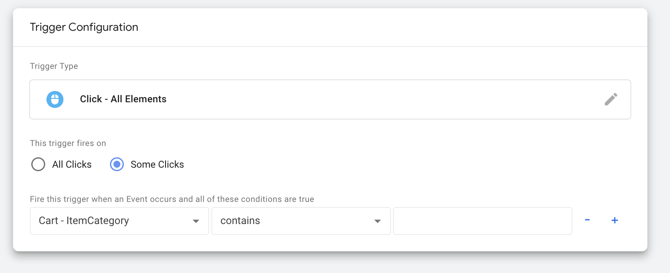
7. Next, choose a trigger to fire on under under the 'Triggering' section
-
- Be sure to define your trigger type (All Elements, Page View, Custom Event) to fire on whatever business action necessary. This is defined by the end customer and not Choozle. For 99% of dynamic pixels the trigger will be a purchase action (we want the dynamic pixel to fire when that purchase trigger fires).
-

- If you're setting up button clicks within GTM, you will want to select the 'Click - All Elements' option, choose whether it's on All Clicks or Some Clicks, then define what event trigger the tag/pixel should fire on (Click Element ID, Click ID, Click Text, Click URL etc).

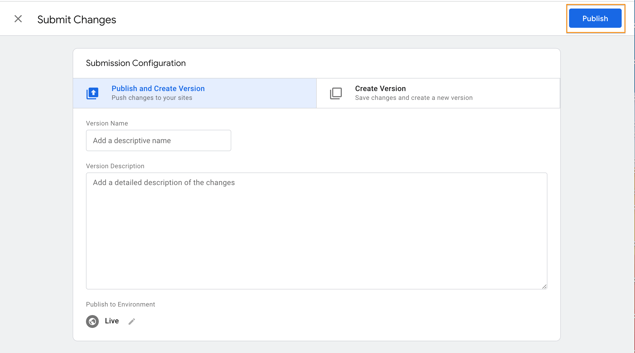
9. Submit and Publish your changes-
Do not forget to complete this step. This step is sometimes missed and prevents the pixel from firing.
10. Reach out to your Choozle Account team or the Support Center to assist with testing the dynamic pixel is passing back data correctly if you have any concerns.![]()
Need Help?
If you have any additional questions please reach out via your Customer Support Portal!